Running a labelling check
A labelling check reads your artwork and tells you, per market, which required on-pack elements are present today, which are missing, and which are coming. Every verdict traces to a cited requirement, and every element found is pinned to where it sits on the pack.
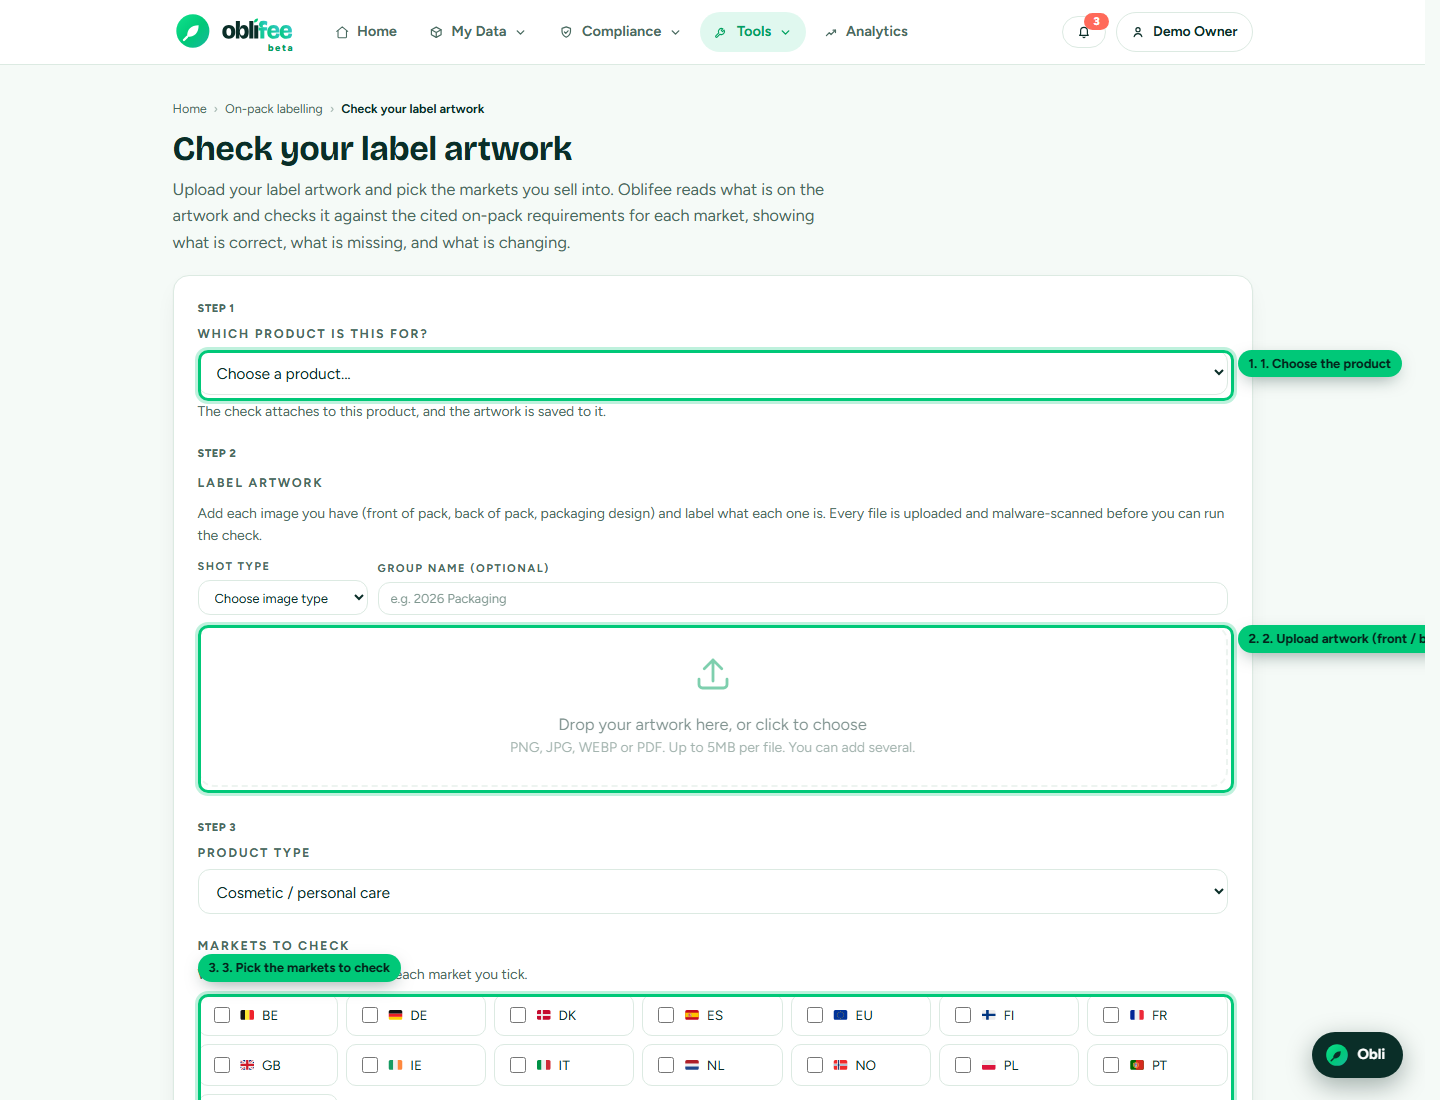
Before you start
- You need a product in your workspace to attach the check to. If you have none yet, add one first from your products list.
- Have your artwork ready as PNG, JPG, WEBP or PDF, each file under 5 MB - usually the front and back of one pack.
- Running a check uses one of your AI allowance credits.
Step by step
- Choose the product. Pick which product this artwork belongs to. Oblifee uses it to attach the check and to suggest a sensible product type.
- Upload the artwork. Add one or more images (front, back, and so on). Each is malware-scanned and staged as you add it - see Uploading artwork for the full detail. You cannot run the check until every upload has finished.
- Set the product type and markets. The product type (cosmetic, food,
drink, textile, detergent, electrical or other) decides which requirements apply
- allergen and nutrition rules, for instance, only apply to food. Tick the markets to check against; your own markets are pre-ticked.
- Run. Oblifee reads the artwork and produces a result.
Under the hood the check runs in three disciplined stages: the artwork is scanned for malware, then read - the only AI step, which observes what is present, where, and in which languages, but never rules on compliance - and finally compared deterministically against the market's cited requirements. So the verdict always rests on a real rule, not on the model's opinion.
Reading the result
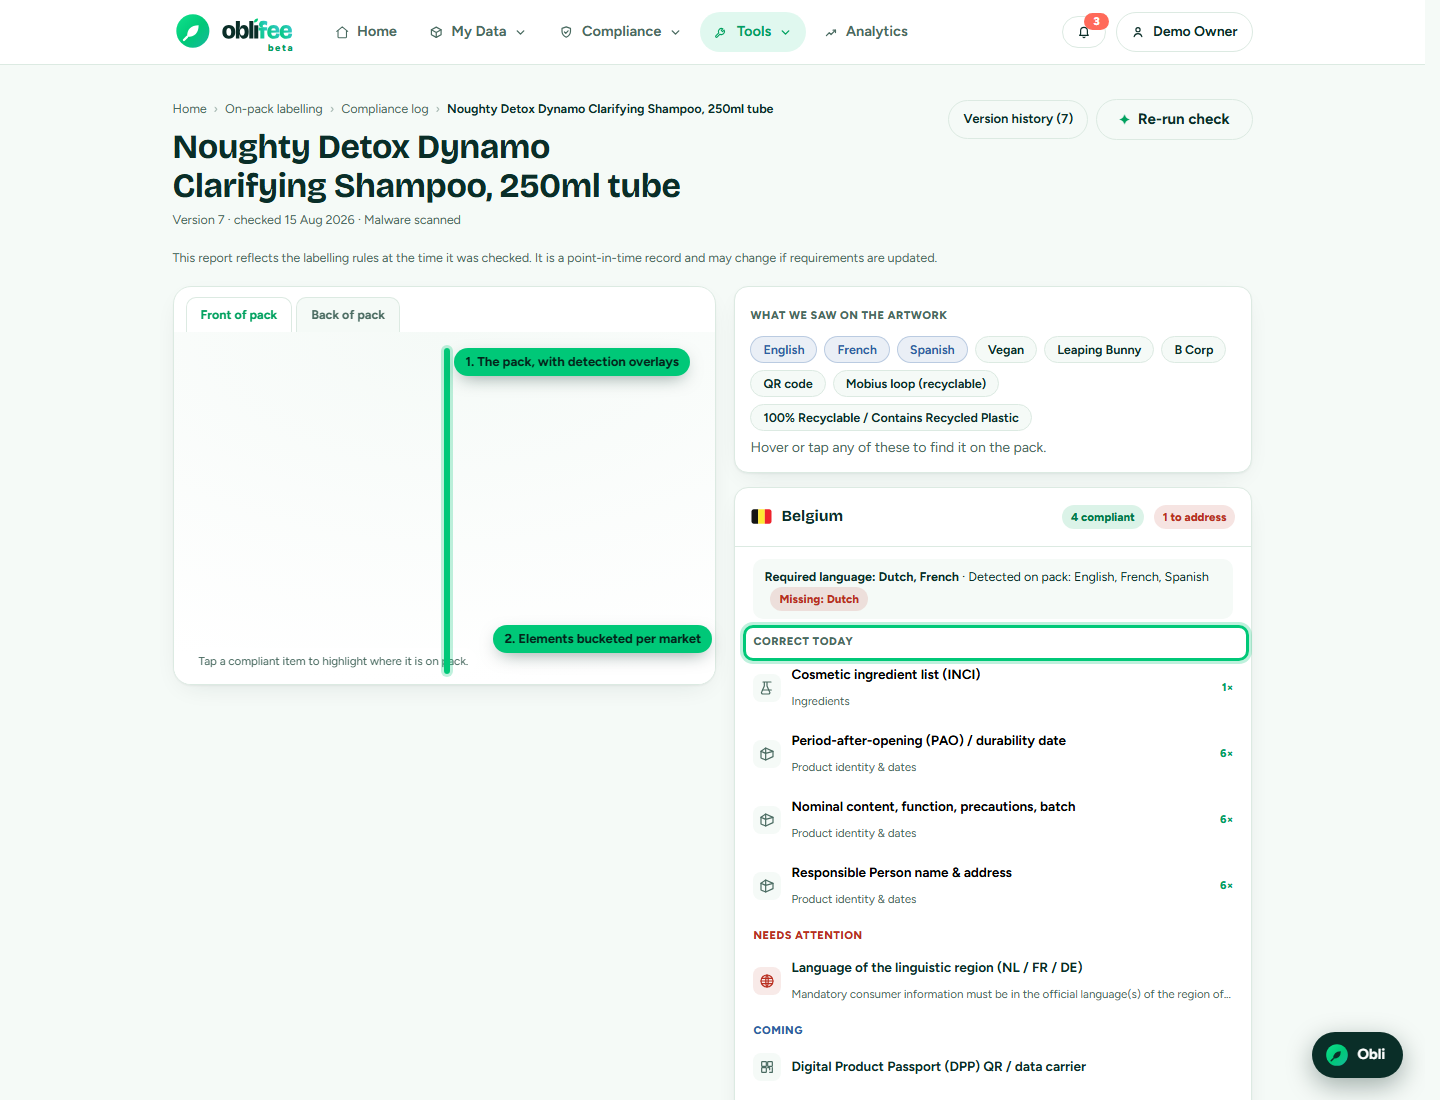
The result has two panels:
- Left - the pack. Your artwork with detection overlays: click an element on the right and its box lights up exactly where it was found. Tabs switch between the images you uploaded.
- Right - the markets. One expandable section per market, with a compliant / non-compliant count, and the elements sorted into buckets.
The buckets
| Bucket | What it means |
|---|---|
| Correct today | A mandatory element that is present on the artwork. |
| Non-compliant | A mandatory element that is missing, or one that needs adjusting for an upcoming rule. |
| Coming | An upcoming or proposed rule - not required yet, but on the horizon. |
| Voluntary | A non-mandatory element (shown for completeness). |
Each element shows its cited summary and, for gaps, what is missing. A dedicated language note per market states the required language(s) versus what was detected, and flags any that are missing.
What we saw on the artwork
An Observed strip lists every language and named mark the reader identified (for example French, Vegan, UKCA, a QR code). Click a chip to locate it on the pack.
:::info Confidence and point-in-time Each check records the reader's confidence and is a versioned, point-in-time record - it stores the exact rules it ran against. If those rules later change, reopening the check flags it as out of date and shows what was added or removed, with a one-click re-run. See The compliance view. :::
:::warning A guide, not a sign-off A check tells you what the cited rules require and what your artwork shows. It does not replace your own or your printer's final artwork approval. :::
Where to go next
- Uploading artwork - add, re-run and manage artwork images.
- The compliance view - find and compare every check.
- Requirements explorer - the full cited rule set per market.