Team and roles
Bring colleagues into your workspace and control what each of them can do. You invite people by email, give them a role, and - for members - optionally limit them to specific businesses. Owners and admins manage the team.
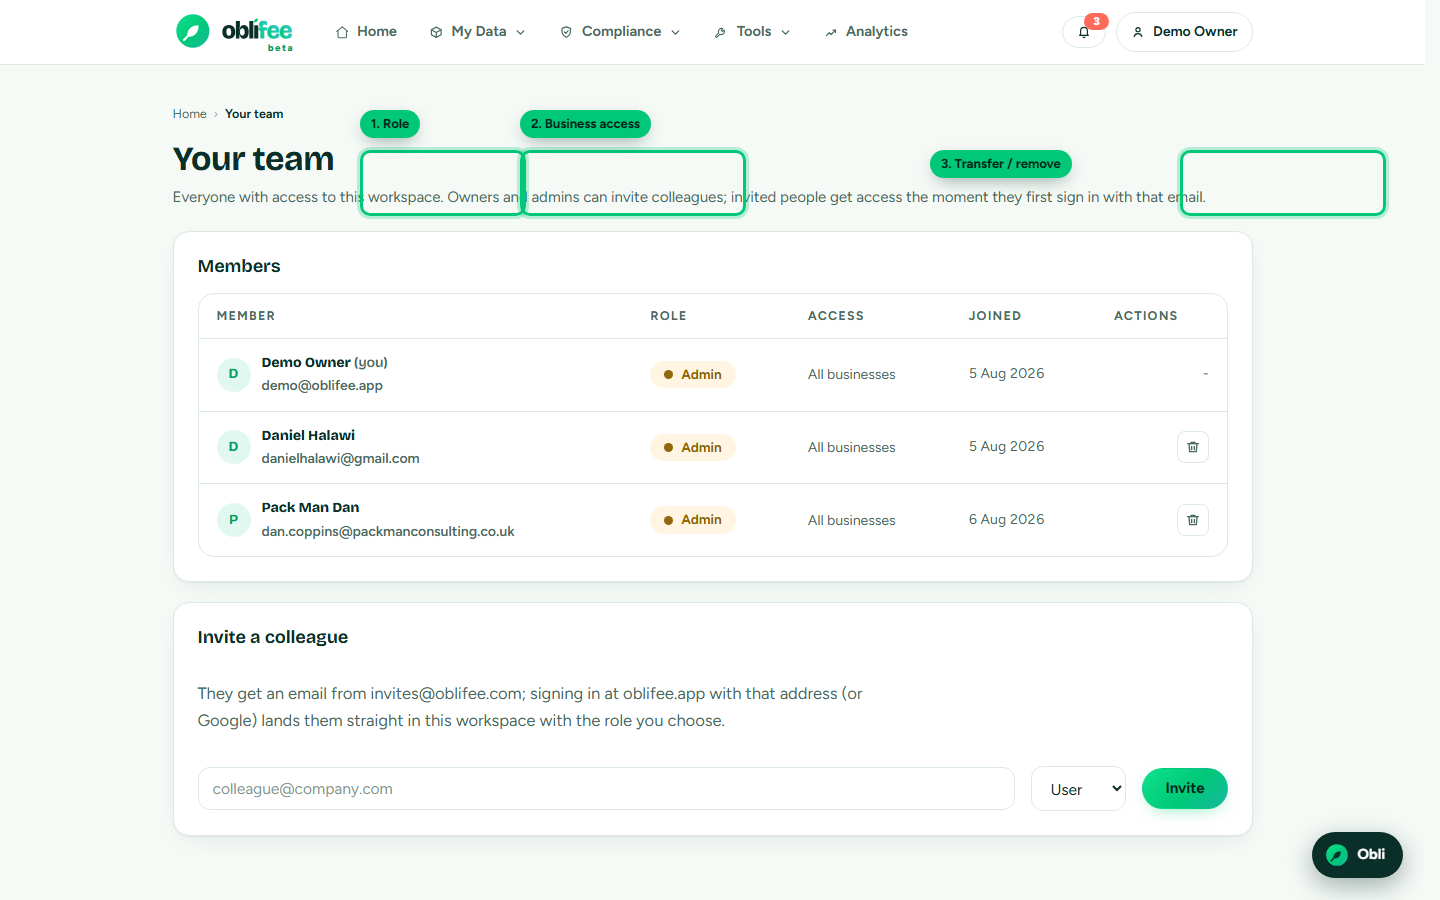
The members table
The Members table lists everyone in the workspace:
| Column | What it shows |
|---|---|
| Member | Name and email, with a marker on your own row. |
| Role | Owner, admin or member. |
| Access | Which businesses a member may see - all, or a named subset. |
| Since | When they joined the workspace. |
| Actions | Transfer ownership or remove, shown as icon buttons. |
The roles
Oblifee has three customer roles. Each builds on the one below it.
| Role | Can do | Cannot do |
|---|---|---|
| Owner | Everything an admin can, plus transfer ownership. There is exactly one owner. | Be removed by anyone. |
| Admin | Manage the team, businesses, brands and billing; edit all data. | Transfer ownership. |
| Member | Work with data and compliance pages they have access to. View-only for workspace management. | Change team, businesses, brands or billing. |
:::note One owner at a time A workspace has a single owner. Ownership moves only by an explicit transfer - inviting someone never makes them the owner. :::
Limiting a member to specific businesses
By default a member can see every business in the workspace. If your workspace has more than one business, you can narrow a member to a subset:
- In the members table, open the access control on that member's row.
- Tick the businesses they should see.
- Save.
An empty selection means unrestricted (they see everything). A subset is a hard boundary - the member simply cannot reach the other businesses' data. Owners and admins are never restricted, so access grants only apply to members.
Inviting a member
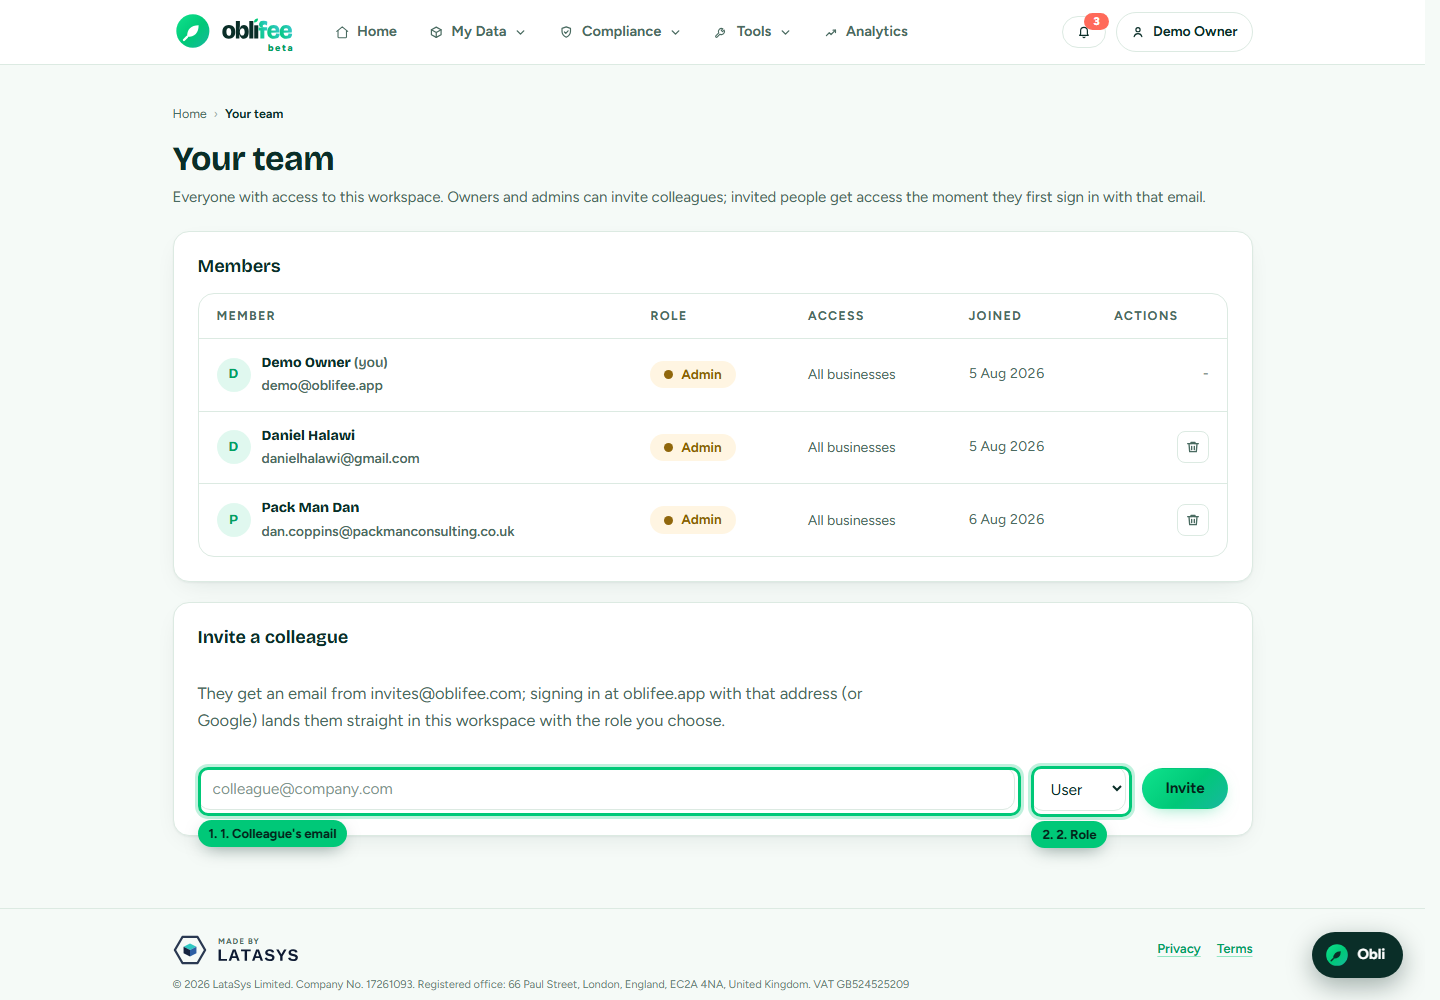
- In the Invite card, enter the colleague's email address.
- Choose their role - Member or Admin.
- Select Invite.
Oblifee emails the invitation. What happens next depends on whether they already have an Oblifee account:
- If they have signed in before, they are added to the workspace immediately.
- If not, they join automatically the first time they sign in with that email address. See Signing in.
Pending invitations
Invitations that have not yet been accepted are listed as pending. For each one you can:
- Resend the invitation email. There is a short cooling-off period between sends; while it is active the resend button is disabled and shows how many minutes remain.
- Revoke the invitation so it can no longer be accepted.
Transferring ownership
The current owner can hand the workspace to another member:
- On that member's row, select the transfer ownership icon.
- Confirm.
The chosen member becomes the owner, and the previous owner becomes an admin. Only the current owner can do this.
Removing a member
To remove someone, select the remove (trash) icon on their row and confirm. A few rules protect the workspace:
- You cannot remove yourself from the members table.
- The owner cannot be removed - transfer ownership first if the owner is leaving.
Where to go next
- Signing in - how invited colleagues join.
- Businesses - the businesses you can limit members to.
- Switching workspaces - belonging to more than one workspace.
- Security & trust - how access is enforced.